Sunday, March 28, 2010
Finished
Finally finished. Everything was put back together, and the rigging tested. I've no idea how well the paint will hold up over time. I've heard many mixed reports. There are definitely less than perfect areas of the paint. However, it looks a damn sight better than when I started. If it stays looking half this good, I'll be happy.

Wednesday, December 02, 2009

Saturday, November 14, 2009
First coat of paint
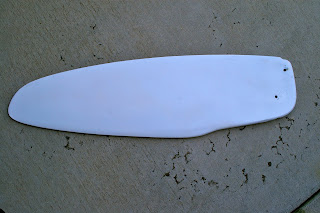
Using the roll and tip method, I painted the port hull using 1/2 qt of Interlux Brightsides, thinned with 10% Interlux 333 brushing liquid. As advertised, the paint self-leveled really well. The result so far is still not what you'd get out of spraying the paint down, but its really good nonetheless.
The application of the Pre-Kote primer is really essential to good flow. The couple places where I'd inadvertently sanded through the primer ended up streaking and showing the color of the underlying gelcoat.
I'll let this first coat cure for a week before I sand it. I will be doing a second coat in a week or two, depending on the weather. Its getting to the coldest time of the year here, and I might have to put everything on hold. At the rate I'm going, I should be done by spring.

Saturday, November 07, 2009
Priming the Port Hull
Due to the limited space I have in my driveway, I'm painting one hull at a time. To prime the surface, I have Interlux Pre-Kote, 333 brushing liquid, a foam roller, and a bunch of foam brushes.
I spent some time yesterday putting the first coat of primer on. I rubbed down the whole hull with a cloth and some brushing liquid. This pulled off all the remaining oxidation dust that seemed to cling to hull no matter what I threw at it. For the first coat, I didn't thin the primer, which in retrospect might have been a good idea. I used the roller to get all the wide spaces, and the foam brush to get the hard to reach places, such as under the lip of the deck.
After the first coat, the blue color of the hull was still visible under the primer, and it had a distinct uneven cloudy appearance.
This morning, 24 hours after the first application, I sanded down the primer with the orbital sander and 220 grit paper. One thing I learned quickly is, I should have the sander firmly on the hull before I turn on the power. If I try and put the spinning sander onto the hull, it tends to rip right through the primer where it first contacts.
Sanding smoothed out all the bumps really well, but also exposed much more of the blue hull underneath. I wiped down the boat once again with the brushing liquid.
For the second coat of primer, I thinned with about 10% brushing liquid. What a difference this made. The primer went on really smooth. I used the "roll and tip" method of painting. What this means is that I had the roller in one hand, and a wide foam brush in the other. I rolled on primer going in various directions. I then followed by lightly brushing down the primer in a single direction. (On the sides, this meant from the lip to the bottom. On the deck, it was from the most recently laid down primer towards the part I'd already done.) After brushing, it looks like it has a bunch of lines, but it self-levels really well with that brushing liquid in it. The result was a much more smooth and uniform look.
The only trouble I see is that on the sides, the tops tended to drip a bit long after I'd past, making it a little too firm to knock down a level. I'll still need to go back and sand the hull of course, and I hope this doesn't present a problem.
I'm actually more worried about preventing this when I paint, but I'll pay close attention as I go. Here are today's results. It looks really good, and I haven't even painted it yet. Sure beats the look of the old hull.

Wednesday, November 04, 2009
Prepping for painting
A random orbital sander is a wonderful thing.


I also remove the rudders and tiller system. I used a simple, quick and dirty way to beautify the tiller by spray painting everything a nice black. I don't know how well this will hold up, but it was so easy to do, that a reapplication is no big deal.
I sanded down 30 years of oxidation off the gel coat. Well, not completely, but everything looks a bit brighter. I still hate the color, and its still going to get painted.
Having sanded down the hulls, I used epoxy putty to fill in all the dings and cracks. Working with this putty is very similar to working with joint compound, just a bit stickier. All I need to do was use a putty knife to press into the scratches, then scrape the excess off. Its always best to leave putty a little high on the scratch, which will pull in a bit when it dries, and is easily sanded.

In some cases, I had to go over the dings and scratches a couple times to get it smooth.
I tried to sand everything down to a nice smoothness, using 120 and 220 grit.


Same with the rudders. I sanded off a bunch a junk and bondo used to patch some poorly drilled holes. The rudders will still an ugly yellowish faded color. I used some white spray paint to fix that. Again, I don't know how well it will hold, but its really easy to redo.
Fixing the soft spot
I hate the baby blue color of this hobie. I knew from the beginning that I was going to repaint the boat, so this didn't concern me. I was more concerned with the integrity of the hull, which was generally good except for the soft spot on the starboard hull.

I patched the holes I drilled with epoxy putty. The epoxy I spilled on the hull got taken care of with some sanding using 120 grit with a rotary sander. Because I'm going to repaint, I'm not concerned about matching color on the putty.
To fix the softspot, I went with the method suggested by Hobie to inject epoxy resin between the layers of the fiberglass. Having never really worked with fiberglass, I didn't really appreciate what I was in for. Seemed simple enough.
I bought a couple of small syringes and a can of resin. I drilled several small holes into the soft spot area. I may two mistakes. First, I mixed in too much hardener. Second, I didn't really think about how I was going to get the epoxy into the syringe. This turned out to be really messy and difficult. It got more messy when I dropped the cup of epoxy on over the hull and onto the ground. Naturally, this all landed smack on top a sprinkler head, gumming that whole thing up permanently. Of course, the syringe started to gum up as well too quickly do to the fact I'd put in too much hardener. My hands and feet got covered in epoxy.
My second attempt went better. I ended up injecting resin all around the soft spot, instead of just in a single area. It seems to have worked well, as most of this area is now rock hard.

Mast base repair


I had much less trouble stepping the mast with the new mast cleat, but once up, the pin refused to budge. With a hammer, I was able to extract it. However, I wasn't able to put the pin fully back in once I wanted to bring the mast down. Naturally, this was not an acceptable situation.
Upon inspecting the mast base, it appeared to be no flush with the mast. There was a 2-3mm of gap on one end, giving it a decidedly uneven appearance. Furthermore, it was being held on by various screws of different sizes.
When I removed the base, it was clear that the mast had some pieces ripped out, and the mast base wasn't looking in the best of shape either.
I went online to thebeachcats yahoo group for some help. I was looking to see whether I should get a new base and maybe cut the bottom half-inch of mast off. I got many suggestions. What I opted for was to get a new base. (I maybe could have gotten away with drilling some more holes in the old base, but it was a small price to pay for my peace of mind.) I did not cut the mast base, but drilled some new holes, and widened others.
In all, I put 5 steel rivets to attach the base to the mast. I used my hand rivet tool, which was hard, but doable. I also cleaned and re-caulked the entire base and all the rivet points. I don't really want the mast filling with water in case of a capsize. I'm still a little concerned about this, and am going to throw the mast into the pool when I get a chance. I might get a Hobie Bob to put on to the mast if it fails the swimming pool test.

Hobie 16 Initial gear replaced
I started with some basic items.

Second was a swivel cam cleat and base for the main traveler. This was a rather simple mechanism, where the base installs to the rear cross-bar, and the swivel cam attaches to the base. The base came with two self-tamping screws and one bolt with a nut. I could not figure out how I was supposed to put that nut inside the rear-cross bar, so I opted to rivet it in instead. I got an inexpensive hand rivet tool, and after a few tries figuring it out, I got the base riveted into the cross bar. The cam screwed onto the base without difficulty.
First, I got a new mast step link and pin. This was simple to install.

The trampoline had a bunch of different line holding it together, which I removed and replaced with new cordage. Lacing up the tramp isn't hard, but I'll need to do it better next time to get it tighter. I also removed some of the rotten hiking straps, and eventually removed them all.
I replaced the downhaul line, and got some new shock cords for the trap wires. Eventually, I'll need to get some additional gear for the trap wires to make it fully functional. I just wanted to have something to hold onto.
I got a new extending aluminum hiking stick.
Refurbishing a Hobie 16

On labor day weekend of this year, I bought an old 1979 Hobie 16. The boat was, overall, in relatively good condition, but like any 30 year old piece boat, it has issues. I've set about doing some refurbishing work over the winter, and will chronicle it here.
Overall, the boat was in fair condition. The hulls were in pretty good shape. There were, naturally, many dings and scratches. The bottom of the hulls were showing through the gel coat, but were not worn to the fiberglass. There was a decent sized soft spot forward of the trampoline on the starboard hull. The hulls were baby-blue, and heavily oxidized.
Standing rigging was in good shape. The mast (full aluminum) is scratched, and has a small dent, but is otherwise in excellent shape.
Sails look like the originals. No tears, though one batten sleeve is looking a little frayed. One number decal is peeling off. I can't comment on the stiffness of the sails, but I'm not racing it (yet.)
The tiller and rudders were in decent shape, though a bit faded and ugly. There was no hiking stick. There was also no cam cleat for the main traveler. It just was completely missing.
Trampoline is in decent shape. (Faded blue vinyl.) Hiking straps were rotten.
When I first tried to raise the mast, I notice that the mast step link was warped and bent. I managed to step the mast anyway and get the pin out, but getting back in was a challenge.
Sunday, May 10, 2009
Wednesday, December 12, 2007
Christmas Photos
Another year has come and gone, and its time for the Christmas photos. Getting the family to settle down for a group photo is one of the hardest things to do, but I got some good results.
Subscribe to:
Posts (Atom)